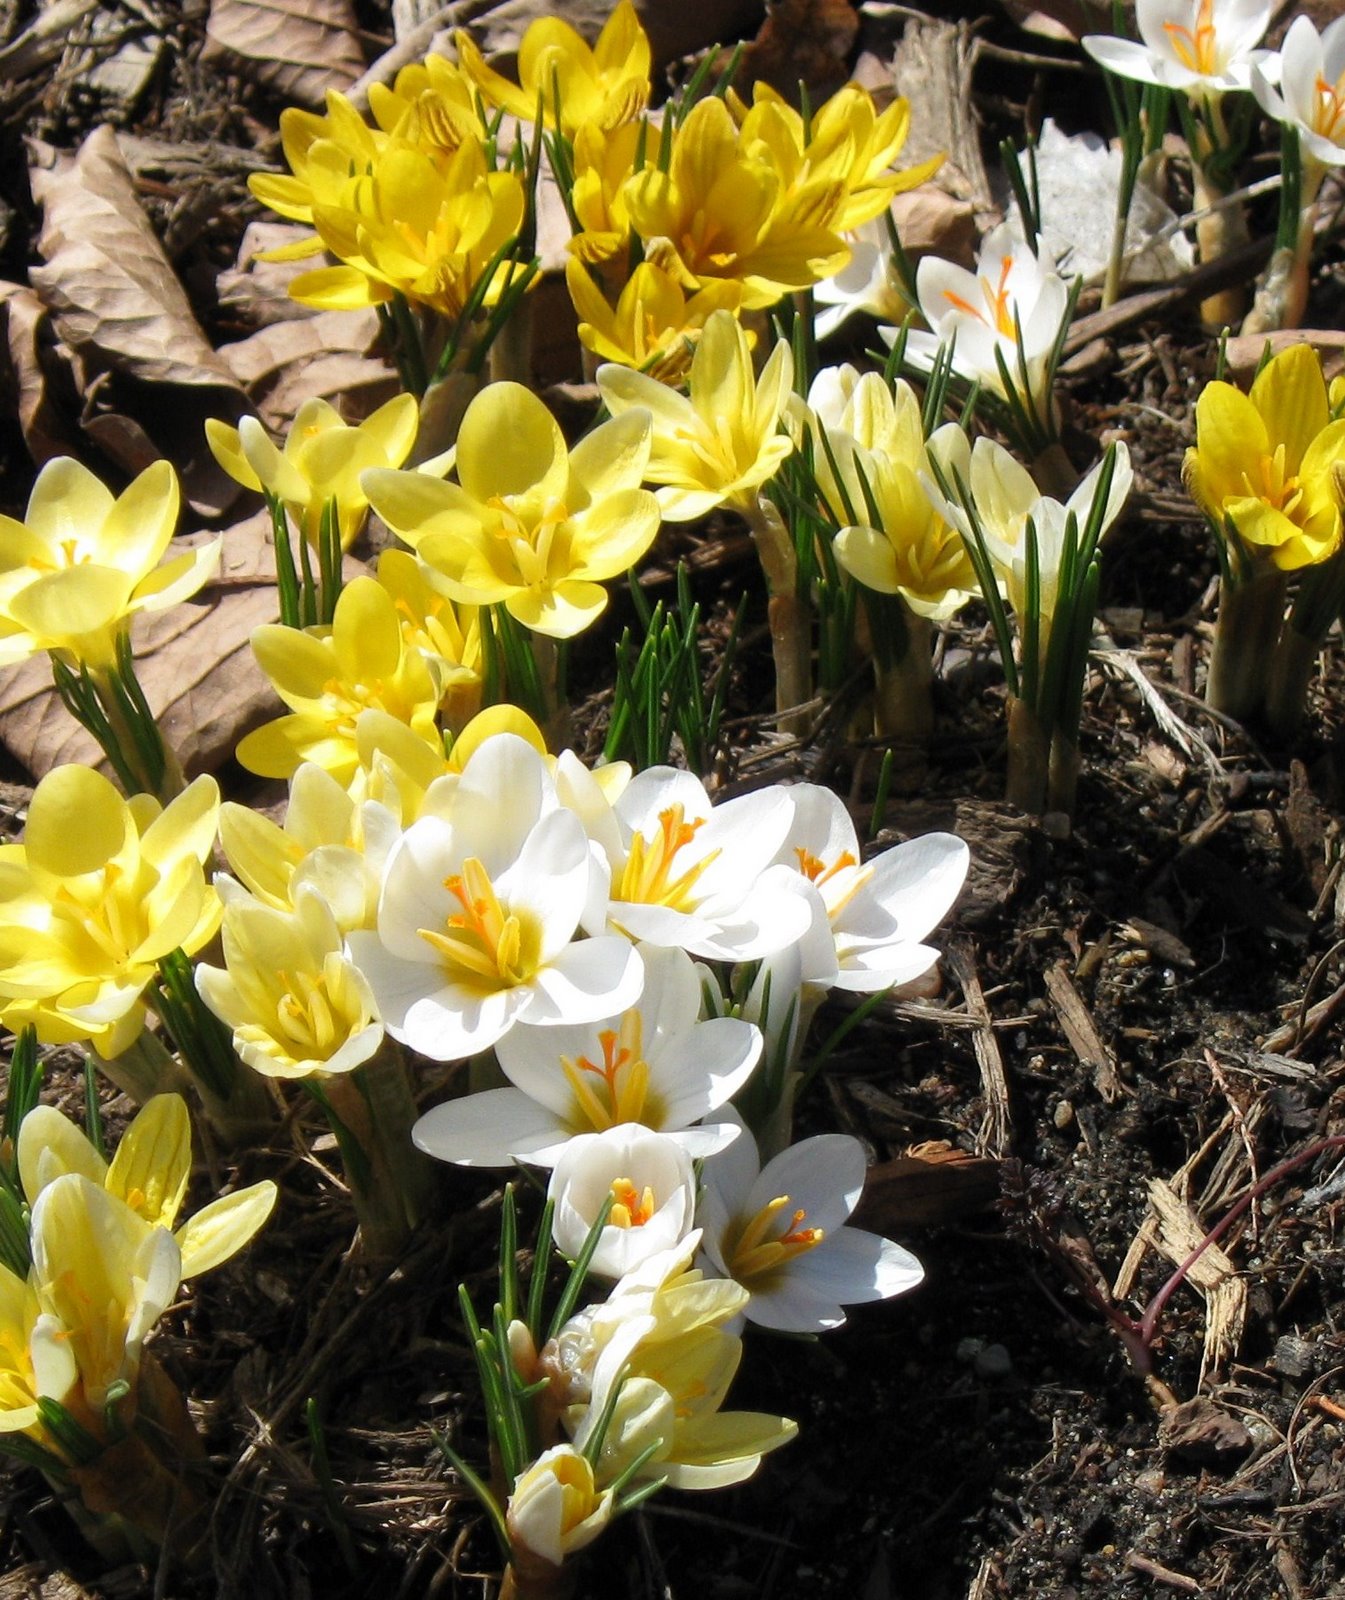
Over 4,000 plant species and subspecies can be found on the Baja California peninsula with over 600 endemic species. The variety of trees and flowering plants is just overwhelming - no matter if you walk through the towns, nurseries, or hike in the mountains of Baja California Sur.
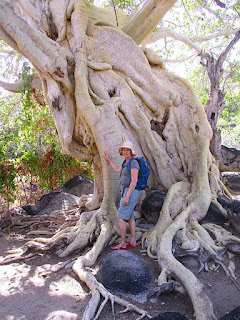
ELEPHANT TREE
In Latin: Bursera microphylla, Spanish: Torote'. Gigantic trunks with peeling whitish bark are grossly thick, forming a stem, especially in plants with a restricted root zone. The foliage is pinnately compound and very lacy and delicate looking, deciduous in most instances. The sap is aromatic and the tiny fruits are quite fragrant.
The elephant tree lives on arid, rocky hills and low-lying mountains in the Sonoran Desert and the Baja California Sur. The sap from Bursera microphylla was used by the native people (particularly the Cahuilla) as a cure-all for diseases, especially those affecting the skin. It was also used as a good luck charm by gamblers, and the Seri tripes use the wood to weave baskets.
Read more:
https://unitedplantsavers.org/species-at-risk-list/elephant-tree-bursera-microphylla/
===
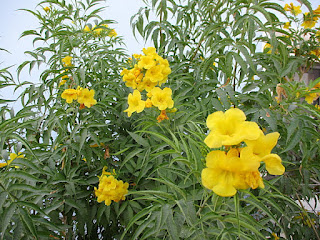
This attractive yellow-blooming - Palo de Arco shrub/tree has been a staple in Mexican folk medicine for centuries and adopted for landscaping throughout Mexico, as well. It thrives even in the hottest, sunniest locations. They are often growing along country roads, beautifying the landscape with their cheery flowers. You can easily plant them in gardens and even build flowering fences, using several of these attractive shrubs.
Watering and feeding: Low to moderate water use, no fertilizer necessary. With its widespread native range in the Americas, it is not surprising that there are many Spanish and Indian names for this showy tree, including Palo de Arco, Esperanza (hope), Tecomaxochitl, Roble Amarillo (yellow oak), Fluvial del Oro (river of gold), Retama (broom), Flor de San Pedro, Tronodor, Corneta Amarilla (yellow crown) and Trompeto (trumpet), among many others.
Propagation through seed planting: The general rule on seeds is to not plant them any deeper than the size of the seed. The Palo de Arco seeds are little wafers and dry easily when sprouted. Start them in a gallon plastic pot scattered on the surface with just a small amount of soil over them or not.
After watering, cover the pot with a plastic bag to keep the seeds damp. The roots will penetrate the soil and when the seedlings are an inch tall, transplant them into individual pots. Palo de Arco can certainly be propagated by cuttings as well!
Read more:
https://www.desertmuseum.org/visit/sheets/Tecsta.pdf
===
NONI SHRUB/TREE

English names are Great Morinda, Indian mulberry, beach mulberry, among others. Polynesian healers used to use noni roots, bark, leaves, and fruit to cure or treat arthritis, menstrual cramps, infections, inflammation, and various other ailments. Noni is also used in the Indian system to cure many diseases.
Noni, at five years old, can produce up to 20 pounds of fruit per month on just one tree. Once past this age fruit yields can get up to 500 pounds of fruit per month per plant. These vats contain lots of Noni fruit fermenting into juice. This will take about two months; then the Noni will be drained through the spigot and bottled. Before being put into these vats, Noni fruit is washed and left to air-dry on a table.
How to propagate, plant, and grow Noni fruit
Speed the process of germination by providing the seeds with extra heat. You can also propagate the Noni plant through cuttings. For this, take a few, 20 cm cuttings from a healthy plant and root them. Plant these cuttings in small pots until the roots start to grow out of them
Plant in full sun in soil enriched with compost and well-aged manure. Dig a hole twice the size of the pot and backfill a little soil so that the final height of the tree is the same as it was in the pot. Backfill and firm down the soil. Water to remove air pockets around the roots.
Since Nonis can survive droughts and are used to hot arid conditions, once the Noni is mature, the plants only need to be watered once or twice a week. If the plant is older it is recommended to water it even less frequently, and each plant should get about 10 gallons of water each time it's watered. Overwatering can cause root damage caused by root rot and accelerate damage from root-knot nematodes. What are the symptoms of root-knot nematodes? Root-knot nematodes do not produce any specific above-ground symptoms. Affected plants have an unthrifty appearance and often show symptoms of stunting, wilting or chlorosis (yellowing). Symptoms are particularly severe when plants are infected soon after planting. Noni is susceptible to a wide range of organisms including croton caterpillars, aphids and ants, cattle, root-knot nematodes, and a number of other pests.
Read more:
https://en.wikipedia.org/wiki/Morinda_citrifolia
https://www.medicalnewstoday.com/articles/noni-juice#recipes
https://www.sciencedirect.com/topics/agricultural-and-biological-sciences/root-knot-nematode
===

PALO VERDE
A mature palo verde can reach up to 25 feet tall and develop a 20-foot spread. The Foothills Palo Verde (Cercidium microphyllum) can be found mostly on rocky slopes. They have a yellow-green trunk, tiny leaves, and pods that constrict around the seeds. The Blue Palo Verde (Cercidium floridum) is usually spotted next to water sources, like washes, and has a blue-green trunk. A palo verde tree needs a site that gets full, all-day sun and provides the tree with enough room to grow to its full size. The tree is extremely drought-tolerant but it doesn't tolerate soggy or wet soil, so choose a planting site with well-drained, slightly sandy soil.
How to plant a Palo Verde tree: You don't have to amend the soil before planting, but breaking it up and tilling deeply does make it easier for the palo verde roots to spread and penetrate deeply. Dig out the soil to a depth at least twice that of the root ball and three times as wide. The larger the area is tilled and broken up, the more space will be available for the tree to root. Palo verde trees depend on a deep root system to survive through droughts. The size of the root ball or nursery pot provides the guideline for planting depth. Dig the planting hole to the depth of the root ball, but make it twice as wide.
Most palo verde branches are covered in thorns, so wear long sleeves and sturdy gloves for handling and planting the tree. Break up the soil around the roots and loosen the root ball slightly. Fill the hole in halfway, and then water to settle the soil before you finish filling the hole with the removed soil. Water a second time after the hole is filled to finish settling the soil around the roots. You don't need to create a raised soil watering ring around the palo verde after planting, because this would only trap more moisture than the tree needs to establish. Prune out any lower limbs if you want to raise the canopy. Prune in spring, beginning in the year after planting. Spray the blades of pruning tools with household disinfectant before and after use to prevent the spread of disease.
Read more:
===
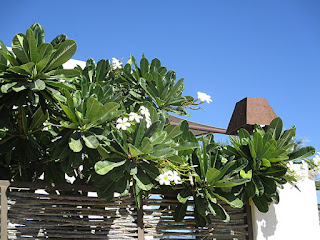
PLUMERIA / FRANGIPANI
Plumeria rubra is a small, flowering, tree or shrub, native to the Caribbean, Mexico, Central America, and South America. In Latin, named Ceratostigma plumbaginoides , the plant loves the heat, can survive long, humid summers, and is drought tolerant. Plumeria ( Plumeria spp.) is known for the heavy fragrance and attractive white or pink petals of its flowers. Thanks to the relatively shallow root system of the plumeria, it can be grown in pots. In plant hardiness zones 10 through 12. Though easy to transplant, plumeria roots do not like restriction, and special care is required to get bountiful blossoms.
Plumeria does best in full sunlight with at least a half day's sun exposure to bloom properly. There are many different types of Plumeria offered in nurseries; deciduous and evergreens. Plumerias may be pruned as needed, up to 12 inches (31 cm.) from the ground in late winter or early spring (prior to new growth), however, any drastic or hard pruning done may reduce flowering. These plants can also be propagated by seeds or cuttings in spring, with cuttings being the easiest and most preferred method. The tips of the cuttings should be allowed to dry for three to five days before planting. Insert cuttings about 2 inches (5 cm.) in potting mix and water thoroughly.
Why do plumeria leaves turn yellow? Not enough water or too much water. Because they need regular, even amounts of water, dry spells can cause plumeria leaves to turn yellow and cause them to drop off the plant, with the bottom leaves suffering first. If you see yellowing leaves, check the soil by digging down several inches making sure it isn't wet.
Plumeria trees should be pruned in winter when the new growth has matured, as this will increase the chance for good blossom in spring. Pruning helps maintain the size, remove the dead and damaged branches, and ultimately help in new growth.
How to propagate Plumerias:
The tips of the cuttings should be allowed to dry for three to five days before planting. No special equipment or materials are necessary to propagate plumeria from cuttings. Simply insert the base of the cutting into the ground or a container of moist, well-draining potting soil to a depth of 3 inches.
https://www.youtube.com/watch?v=eAUa6ALtwOo
https://www.youtube.com/watch?v=JiZ4gp5pZKM
https://www.youtube.com/watch?v=uN4Ayu2HPtU
Read more:
===
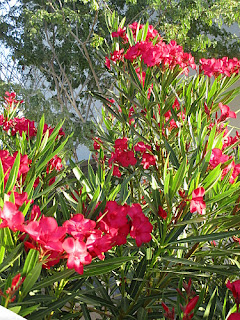
OLEANDER
Oleanders are a mainstay of Mediterranean gardens, widely used for screen planting, on hillsides, and alongside roads. Flowering in summer, the large open clusters can be single or double, and come in many colors including white, pink, red, and peach. Oleander, Nerium oleander, is a tender shrub and must be grown where temperatures never dip below freezing.
Oleanders need regular watering from spring to autumn to keep the compost evenly moist and it’s especially important that plants don’t go short of water in spring when flower buds are forming. During winter, reduce the frequency of watering as growth slows. Feed with a liquid fertilizer every two weeks or so from late spring to early autumn.
Oleander shrubs require minimal care. Although the shrubs are drought-tolerant, they look their best when they are watered during dry spells. However, take care not to overwater them. Yellowing leaves indicate that the plant is getting too much water.
Pinching out the tips of young stems reduces legginess and encourages the shrub to branch out. Pruning oleanders can also be performed. Prune to remove damaged or diseased limbs any time, and prune to shape the shrub in late fall.
Read more:
https://www.gardeningknowhow.com/ornamental/shrubs/oleander/oleander-growing-tips.htm
===
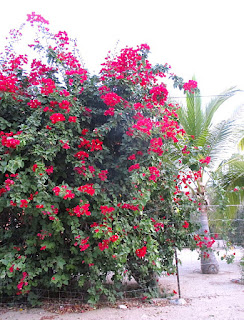
BOUGAINVILLEA
Bougainvillea is tough as nails, fast-growing, and puts on a spectacular show of color year-round. These vines are flowering machines that look great climbing a wall, sprawling as a ground cover on hillsides, or pruned and grown in containers. Here's what you need to know about growing bougainvillea.
Bougainvillea is native to Central and South America and commonly cultivated in Mexico, South Florida, Arizona, South Texas, and Southern California. Bougainvillea vines are fast growers and have stiff stems with thorns covered in heart-shaped leaves. Their vines can grow up to 40 feet tall with support. Low-growing, shrubby varieties only get a few feet tall and can be grown in containers. Bougainvillea blooms come in purple, red, orange, white, pink, and yellow. But those blooms actually aren't blooms at all. The paper-like structures are a modified leaf called a bract that hides bougainvillea's true flowers: small, trumpet-shaped blooms of white and yellow. Bloom time is year-round, Hardiness Zones: 9 to 11, but can be grown as an annual in colder areas
- Bougainvillea needs lots of sunshine. Plant one in a shady spot and you won't get the riot of blooms — the whole point of planting bougainvillea. You will get vines and thorns. It needs at least six hours of full sun per day. The soil must be well-drained soil. They don't like to remain wet for too long and can get root rot in heavy soil. They like gritty, loose soil. Handle the root ball with care. Bougainvillea roots are thin and can be easily damaged during transplanting. Water after planting and then weekly until the plant is established. Once it's established (which generally takes one to two years), stop watering it except in times of extreme drought. Bougainvillea likes it dry.
- Caring for Bougainvillea: Prune your plant throughout the year, but especially in the late winter before the new growth cycle. For best bloom, trim all branches back to 20 feet or less. Bougainvillea blooms on new growth, so you can prune after each bloom cycle. Pinch off the ends of vines that are about to bloom. You'll get a denser display of bracts. If you're getting regular rain once the vine is established, you don't need to water. Bougainvillea likes it dry. It prefers a good, deep watering every three or four weeks rather than frequent shallow waterings. Give a bougainvillea too much water and it can get fungal diseases and root rot. Bougainvillea blooms better when kept on the dry side. Too much water will give you lots of green growth and fewer flowers. Keep it dry. These tropicals don't like to go below 30 degrees. They can withstand one or two nights of a light freeze but anything more and they'll die. Don't fertilize it. This tough plant doesn't need it. But do feed the soil around it with compost. A 3-inch layer of compost in the spring is plenty. If you must fertilize, use palm and hibiscus food.
Important: Taller growing bougainvilleas need support or they'll be ground cover. Since they are twining vines and don't have tendrils to attach themselves to walls, you'll need to tie them up. They can be trained on a trellis, over an arbor, on a fence, or on a structure. Use strong ties and tie them well, because bougainvillea branches can be heavy.
Read more:
https://www.joyusgarden.com/bougainvillea-plant-care/
===
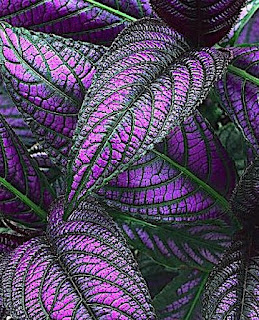
PERSIAN SHIELD
Cultivation and History
Tropical Persian shield, aka royal purple plant, thrives on heat and humidity, yielding its most brilliant color in bright, indirect sunlight and partially shaded locations. It prefers temperatures above 60°
The characteristic broadleaf foliage positively shimmers. Neon shades of purple-veined with green seem to be overlaid with a silver gloss. The growth habit is upright with leaves that are lance-shaped and measure six to eight inches long. Stems are soft and may exceed three feet in height. Over time, they may become woody.
Small, tubular, cone-shaped blue flowers, reminiscent of Virginia bluebells may bloom in season, but these are a rarity. The reason is not entirely understood but is believed to be an example of “masting” behavior, in which blooming is sporadic, but profuse when it occurs.
This botanical phenomenon makes it impossible for wildlife to depend upon the seeds for food, as they are not always available. From Europe, the Persian shield made its way into American Victorian gardens and households at a time when tropical foliage was enjoying its first North American heyday.
How to Grow
In Zones 10 to 11, you can cultivate your plant year-round in the ground or in outdoor containers, for evergreen foliage. If the light is too bright, the leaves will appear pale and may even scorch. For container gardening, use a good quality, organically-rich potting soil and a container with adequate drainage holes and a depth of at least 12 inches. Keep the soil moderately moist by watering when the top third of the soil feels dry to the touch. For garden growing, work the ground to a depth of eight to 12 inches. Water weekly in the absence of rain, using a moisture meter as your guide. Fertilize at planting time and midway through the growing season, using a liquid plant food diluted to 50 percent.
Propagation From a Soft Stem Tip Cutting
You’ll need to take a soft stem tip cutting from a friend’s plant, or purchase a potted one from a nursery. Seeds are not readily available. To start with a cutting from existing foliage, cut a length of stem, measuring from the growing tip down about four or five inches. If blooming has occurred, wait until the last flower drops and a flush of new growth appears. Be sure to cut about one-quarter of an inch above a leaf node, the place where leaves originate. Remove the bottom pair or pairs of leaves to reveal about three inches of bare, leafless stem.
Place the bare stem in a narrow clear container containing two inches of water. Change the water daily.
Once roots grow to at least an inch long, transplant the cutting to a well-draining vessel filled three-quarters of the way with potting soil, or plant it out in the garden. Be sure to take mature dimensions into account when growing in the garden or outdoor containers. Plants need between one and three feet to spread out, and a soil depth of about 12 inches to support healthy root development. Bury about one inch of the rooted stem in the soil, so the crown, where the roots and stem meet, is buried. Tamp the soil down securely. Maintain even moisture by watering when the top three to four inches of soil feel dry. Avoid letting pots dry out completely, but don’t oversaturate the potting medium.
Read more:
https://www.epicgardening.com/persian-shield/
===

HIBISCUS
Tropical hibiscus - Hibiscus rosa-sinensis - plants produce flowers constantly, but each blossom only lasts one day. The shrub is fast-growing and can add up to 24 inches per year, eventually reaching heights of up 15 feet when growing under the ideal conditions. They will grow between 4–10 ft. tall, 5–8 ft. wide, and like full sun to partial shade and moist but well-drained soil. Tropical hibiscus is a thirsty plant and will thrive and produce blossoms only if it is given enough water. Depending on the heat, wind, and humidity in your environment, your plant may need to be watered daily. Regular adding of compost and feeding with fertilizer will keep it blooming vigorously.
Hibiscus plants thrive on attention. Pruning hibiscus is a great way to give these plants just what they need. Pruning helps stimulate budding on new shoots. It also rejuvenates the plants after their long winter nap while encouraging them to maintain an attractive appearance and healthy, vigorous growth. Before pruning hibiscus, make sure your pruning shears are sharp and clean, preferably sterilized with alcohol gel, to prevent the spreading of any disease from affected branches. When pruning hibiscus plants, they should be cut about a third of the way back, leaving at least two to three nodes on the branches for new growth to emerge. These cuts should be made just above the nodes, leaving about a quarter-inch (0.5 cm.).
Propagate your tropical hibiscus from soft-stem cuttings taken in late spring or early summer after the plant has begun active growth for the season. Choose a stem with a greenish cast that's 4 to 6 inches long. Use a sterile, sharp cutting tool to cut the stem. Remove all but the top set of leaves from the stem. Trim the bottom of the stem just below the bottom leaf node and dip the end in a rooting hormone. Put the cutting in a pot of well-draining soil that's half potting soil and half perlite. Moisten the soil and push a hole into the dirt in which you place the cutting. Put a clear plastic bag over the plant, but make sure it does not touch the leaves. Bagging the cutting preserves moisture and retains heat while it establishes roots.
Read more:
https://www.happysprout.com/gardening/protecting-hibiscus-flowers-from-pests-the-basics/
===
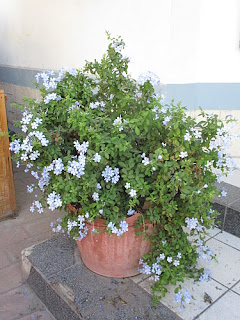
BLUE PLUMBAGO
The plumbago has been described as a fast-growing, semi-woody perennial shrub that produces phlox-like blue flowers almost all year round. When planted, the bush/shrub forms into loosely branched mounds that grow up to 36″ inches tall and wide. Although the thin branches of Plumbago have an arching habit, the plant has oblong foliage about two inches in length. The bush with beautiful blue blooms not only attracts the eye but its scent attracts butterflies. If you are a butterfly lover you’ll love the plumbago to make your outdoors lively and beautiful. In areas where there are no severe freezing temperatures or frost, the plant remains evergreen throughout the year. The perennial plumbago blue thrives in the south in USDA plant hardiness zones 8 – 11, where it is used extensively as an outdoor landscape plant, planted in partial shade but in full sun locations.
Plumbago Care
When used as a ground cover or in beds it is best to plant in early Autumn or early spring. Select a suitable growing location with lots of partial sun at a minimum. Plant in well-drained soil, full of organic material with a 1/3 of each – loam, peat moss, sand – consistency. For the best growth and abundant blooming, add flower plant fertilizer or shrub fertilizer every two weeks in spring and summer. Stop adding fertilizer as soon as your plumbago has stopped blooming. After planting, water thoroughly and allow the soil to become nearly dry before watering again. Fertilize the plumbago plant regularly for a strong root system and full flower heads. Propagate by cuttings of nearly ripe wood in spring or fall, by root division of old plants, and by seeds.
Read more:
https://www.nature-and-garden.com/gardening/plumbago.html
https://www.nature-and-garden.com/gardening/propagating-plumbago.html
DATE PALM TREES
This date palm tree- - Phoenix dactylifera - is more commonly referred to by it's variety name, Medjool Palm. Its long botanical name is Phoenix Dactylifera Medjool Palm. There are many varieties in the genus, for example, the True Date, Barhi, Deglet Noor, and Zahidi. The Deglet Noor and Medjool Palm are the most sought-after variety in the Dactylifera genus. All palm trees in the Phoenix family are considered to be prestigious.
Plant the trees in spring or fall for best results. Dig the hole twice as deep and wide as the actual root base to loosen the soil. Fill the bottom of the hole with soil so the plant is sitting high and roots are barely covered. Press soil around the roots and water well to compact the soil around them. Young trees do best with supplemental irrigation for several months until they are established. You may also need to stake them for straight date palm growing.
How to Care for a Date Palm: After planting date palms, you will need to follow good date palm tree care. In addition to irrigation and support, palms need good nutrient management and pest and disease control. Composted manure makes an excellent fertilizer in early spring. You can also use a palm tree fertilizer high in potassium. Once trees are established, you will rarely need to water them. Date palms prefer dry soil and excess moisture can inhibit growth.
Read more:
https://www.masterclass.com/articles/how-to-grow-dates
===
PALMA AZUL TREES
Lots of attractive palm trees that are dotting the peninsula - mostly where there is water in the vicinity or gardens where they get some moisture - are Palm trees.
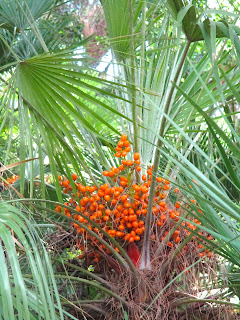
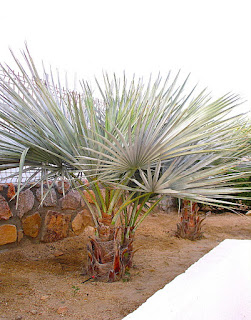
One of the most beautiful is the grey-blue Hesper Palm tree or Palma Azul how it is called here. Scientific Name: Brahea armada - Common Name (English): Blue Hesper Palm - Common Name (Spanish): Palma Azul. Striking blue fan-shaped leaves make a bold statement in the landscape. Creamy white blooms form in summer on long inflorescence which hangs down from the leaves. Native to Baja California, this palm is slow-growing and tolerant of rocky soils and desert heat. Maintains its unique blue coloring best in full sun. The average size at maturity is 15 - 20 ft. tall and 6 - 8 ft. wide. Can reach up to 40 ft. tall with age. Special features are a dramatic foliage color, easy-care, water-wise, and a native plant.
While the date palms that were brought over by the Jesuit missionaries are the most ubiquitous palms on the peninsula, it’s the Blue Hesper Palm that’s endemic to Baja California. The distinct color of the silvery/blue fan-shaped leaves differentiates it from any of the other green-leaf palms on the peninsula.
Read more:
https://homeguides.sfgate.com/tell-palm-trees-need-water-29456.html
===
Most of the plants in this article can be found in the large gardens at the Tango Azul Resort in La Ventana. Another article will cover more plants that are either endemic or thriving in Baja California Sur and in the Tango Azul Resort
.
<><><><><>
.