Tuesday, November 23, 2021


Garden Styles for Shade and Sun


Are you acquiring a new home with a garden?  Or do you want to change parts or your whole garden? Which plants do you like best?  What would be your favored garden style?  And does it fit the type of home?  But more important to your climate and the surrounding trees?

Garden styles have evolved throughout history, from trends in different locations around the world.  Creating a garden style that fits your home and the light conditions is the first step in creating a garden design.  It’s also a good starting point if you want to give your garden a lift.  It helps you narrow down choices in garden furniture, suitable plants, and ornaments.  Garden styles can be grouped into a few categories:
.


English Garden
The most popular seems to be the English garden in which beds of mixed plants are arranged that almost all the soil is covered by various kinds of plants to create a harmonious effect of abundance and beauty.  No matter what time of the year, English gardens contain flowering plants, sometimes intermingled with complementing shrubs and trees.  Some effort is necessary to establish and maintain such a full garden.  English garden plants require almost always sunny conditions.
.


French and Italian Styles
French gardens contain carefully arranged plants that are pruned or otherwise arranged to give an overall pattern.  There is usually a limited variety of plants used and flowers tend to be not as important as are the shapes and textures of the plants.  French garden styles fit both: sunny and shade conditions.

Italian gardens are similar in that they value structure over flowers and prefer geometric plantings.  Better suited to places where larger vistas and sunny areas are present. 


Japanese Gardens
The Japanese style suits small garden spaces very well and is formal too - but in a different way.  Every plant and ornament is carefully chosen and placed to create ‘pictures' that are pleasing to the eye.  Rocks and stones feature prominently in Japanese gardens.  Japanese gardens need quite some maintenance.  Any flaw in a plant or object will jar the eye and spoil the overall impression. 

.


Woodland Gardens
It differs from other styles as most of the plants chosen need a level of shade tolerance.  Avoid planting in lines or formal designs and aim for a mix of interesting textures, forms, and colors.  Research shows that lots of shade-loving plants are blooming, such as lenten rose, daffodils, astilbe, violets, snowdrops, lily-in-the-valley, coleus, begonia, spiderwort, columbine, hostas, bleeding heart, heuchera... the list goes on and on.
.


Prairie-Style Gardens 
A relatively modern style of garden, fitting perfectly to bungalow-style homes.  In these gardens, large swathes of plants are combined to create impressions of movement and flow.  Especially when grasses are added.  Color occurs in great drifts rather than from the combination of different plants as would be the case in an English-style garden.  While Prairie-style gardens look informal and very naturalistic, they require careful attention to scale and only a few different plants.
.


Waterwise gardens
Xeriscaping is a smart decision.  Warmer temperatures, drought conditions, and water restrictions mean creating a garden that requires less water – one that is both drought-tolerant and water-wise - and look beautiful.  All types of sedum plants are perfect, as well as Russian sage, coneflowers, salvia, lavender, yarrow, etc. 


.

Avoid This:
Before even creating healthy garden soil beds, browsing garden centers, and just purchasing everything that catches your eyes and/or is on sale.  And not even checking the plant labels for sun exposures, hardiness zones, maximum growing height, and watering needs.


Planning Required!
You need a plan to decide what you want in your garden and where you want to place everything.  A plan will guide your purchases and what work to do when.  Making a plan will help you to establish a general color scheme, the amount of lawn, patio, or deck.  How many trees or shrubs will you include? And where to make perennial beds?

No matter what style of garden you prefer and what fits into your surroundings, climate, and your house style: choose few plant types but in larger numbers, such as ten to fifteen each.  It gives a more lush and professional look.  Bear in mind the final size of the plants.  Most perennials grow at least three times the original size within a few years.  Fill in the early blank spaces in the first years with annuals.


The Foundation of Your Garden:
No matter which type of garden you create: plant health and beauty come down to healthy roots, and to encourage better air and water circulation, you need to focus on long-term nourishment.  The solution?  Use compost!  It's rich in nutrients, and if you make your own compost, you are doing wonders for the whole environment.   The best part is, it's impossible to use too much compost - so sprinkle it all over your lawn and garden beds.

Happy gardening!

.

<><><><><>

.

Monday, October 25, 2021


Plant Cheerful Spring Flower Bulbs Now


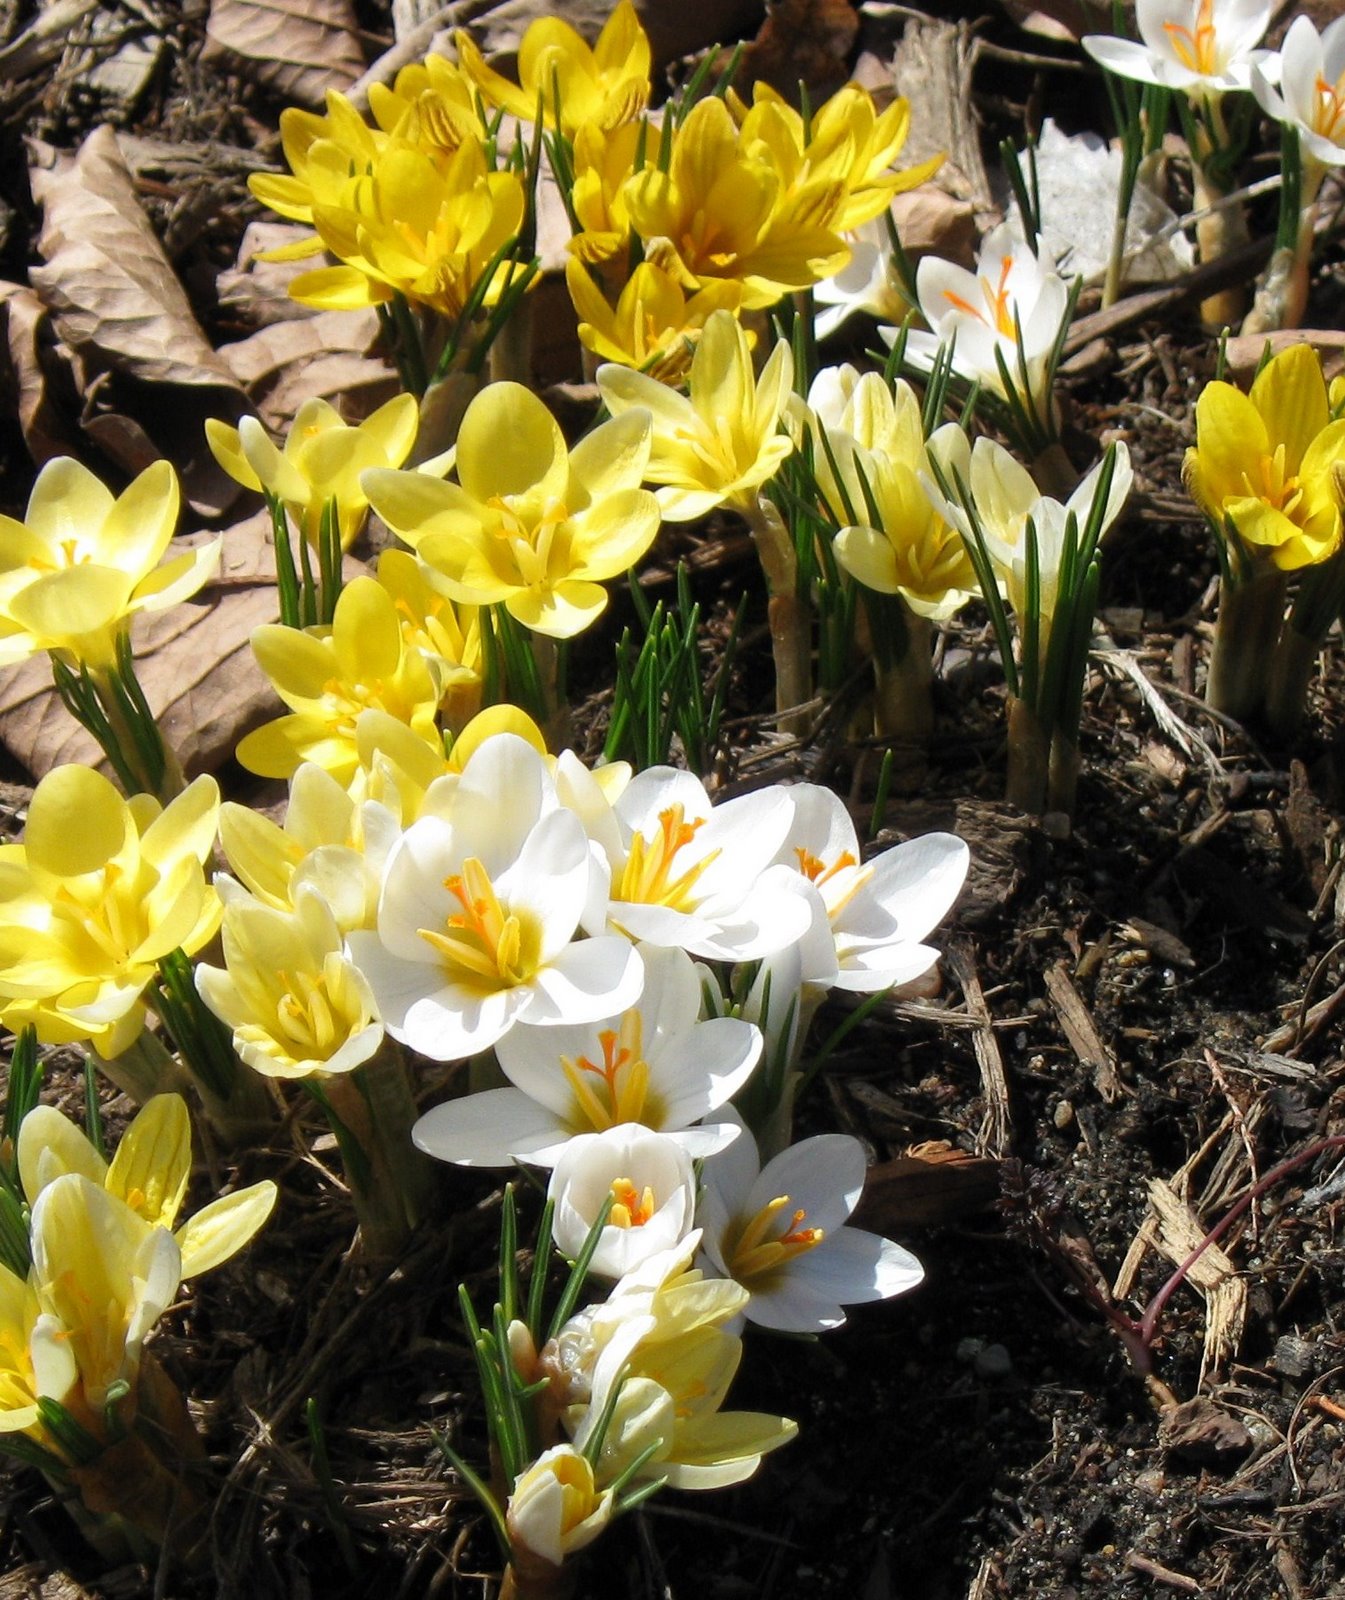
Did you already plant your spring bulbs?  From the end of September to the end of October is the best time, depending on which hardiness zone you live.  Spring bulbs will definitely shorten the winter, bringing lots of cheerful colors into your garden - long before everything else is blooming and before the trees will show their leaves.


Plant Daffodils, Alliums, Tulips, Hyacinths, Crocus, Snow Drops, Scilla Siberica... in groups of seven, nine, or eleven bulbs - each one to two inches apart from each other.  Plant them directly behind other perennials to avoid seeing their withered leaves after blooming.  Cut the blooms and their stalk after they fade, and let the leaves soak in the sun and healthy soil - in order to store nutrition for next year's flower show.  


The most important thing is that the part of the garden where the flower bulbs are to be planted must not become too wet during the winter.  Water that remains in puddles several days after rain will absolutely ruin bulbs.  After all, they originate from dry areas in Russia, Turkey, Iran, and the high plains of Central Asia. 


Crocus, Snow Drops, and Scilla brighten a boring lawn in spring and naturalize easily.  However, mowing your lawn after bloom should wait at least six weeks.


Early spring flowers can bring the color and warmth of spring to your garden weeks ahead of the official springtime - a joyful garden sight!  So, don't forget to plant lots of bulbs NOW.


More Information:

VIDEO

Amazing Spring Bulbs That Beautify Your Garden

https://www.youtube.com/watch?v=6TP3P4cs0Tc


Top Performing Springs Bulbs that Naturalize

https://www.gardenia.net/guide/12-top-performing-spring-bulbs-that-come-back-year-after-year 


Frequent Asked Bulb Questions

https://www.flowerbulbs.com/678/faqs


.

<><><><><>

.


Sunday, October 3, 2021


Create Your Own Coleus Flowers for Next Summer


The largest - more than two feet in height - and most magnificent coleus plants I have ever seen were propagated by a friend.  Last year I pinched a bunch of coleus twigs in fall from her garden before colder temperatures set in.  I explained in detail how to create her own coleus plants for next spring:

"Take away the large leaves, place the twigs in a glass of water and set it on a window sill, renew the water twice a week. Then after eight weeks when roots are built, plant them in pots and set them on a sunny window. As soon as the last frost has gone (usually in late May) plant the coleus in garden beds or planters." 

She propagated with enormous success. I am totally impressed by her attractive coleus plants!


How to Propagate With Cuttings

Are you tired of buying expensive plants in spring, or do you not even find the same types that you have already in your garden?  Why not propagate with cuttings?  Contrary to propagating with seeds, you can be sure that your new plants look exactly like their parent plants.

Soft-cuttings, such as coleus should build their roots in water.  Any cuttings of roses, hydrangeas, or other bushes and shrubs can be dipped in rooting hormones (on their cut ends) and placed in potting mix. Remove most leaves, so that only the small ones on top of the twig are left. Time your softwood propagation for late spring or early summer, when new stems first start to harden.  This mostly happens between May and mid-July. 


Water-Rooting

  • If you are water-rooting your cuttings, change the water twice a week to keep it fresh. 

  • Heating and air conditioning can create dry conditions indoors, avoid setting your plant close to outlets. You also need to make sure your plant will get lots of natural light after they take root - but not the sun!  The best location for them is to place in the shade or dabbled shade. 

  • Don't leave your cuttings too long after they have rooted. Once the roots grow to the bottom of your water jar, it's time to transplant your cutting to a pot, filled with planting soil.


Later, when the coleus' is established, the best leaf color is achieved with morning sun and some degree of afternoon shade.  Some gardeners leave the tiny flowers, but it's best to pinch them off to direct more energy into stem and foliage growth.  Coleus left to flower may lose vigor as the plant puts energy into seed production.


Soil-Rooting

  • Use a soilless medium for plant cuttings, such as coir, sphagnum moss, Oasis rooting cubes, or Rockwool, as the microbes in organic soils can cause your plant cuttings to rot before they grow roots.  

  • Place a clear plastic hood with small wholes over the planting pot, so that the new plants have always enough moisture. I always remove the bottom of a large soda bottle, place it over the planting pot, and have the perfect moist environment for your plant(s).

  • Cut the stem into 4- to 6-inch lengths with a knife or pruners, each piece right above the node where leaves attach to the stem.


.


<><><><><>

.

Monday, September 27, 2021


Botanical Garden: A Sanctuary in Downtown Antwerp


Trying to escape the crowds downtown, around the Rubens House, and the market in Antwerp on a Saturday afternoon, I stumbled by chance into this small sanctuary.


This small, enchanting Botanical Garden just two minutes from the Rubens Museum was a green haven in the city center for me.  With exceptional shrubs and trees, over 2,000 herbs, cacti, and other foreign plants it is a world in one garden. 


Built almost 200 years ago, it initially grew only medicinal plants to supply the St Elisabeth’s hospital next door. Now it has even a glasshouse to grow tropical plants. It is open on weekends: Saturdays from 13.30 till 15.45 and on Sundays from 10:00 till 13.00.


A restaurant and lots of benches throughout the garden invite visitors to rest and "smell the roses". 


.

<><><><><>


How to Easily Test Your Garden Soil


When I recently helped a friend to improve her large garden I could not find a single earthworm.  As I dug into the soil, it looked depleted, compacted, and extremely dry.

Success in the garden starts with the soil.  As much as—and sometimes more than—moisture and sunlight, determines whether plants thrive or die. Your soil needs to be able to provide nutrients to plants and allow plants to take up the nutrients in the soil.  Otherwise, your plants just won’t grow well.  Here are a few quick and easy ways to test your soil:


The peanut butter or mason jar soil test:

This should take about 1 hour to set up and a full day to conclude. Find an empty straight-sided jar, such as peanut butter or mason jar, with a lid, and have a ruler handy. Dig down to root level—about 6 inches—in the area that you want to test and remove enough soil to fill the jar to between one-third and one-half full. Next, fill the jar to the shoulder with water, then set the jar aside to let the soil soak up the water. Put the lid on the jar and shake it hard for about 3 minutes.

  1. Set the jar down and look at your watch. In 1 minute, measure (with the ruler) the amount of sediment that has collected at the bottom. This is the sand in your soil.
  2. Wait 4 minutes more. Measure the sediment again: The difference between the two numbers will be the amount of silt in your soil. 
  3. Take the third measurement in 24 hours. The difference between the second and third numbers will be the amount of clay in your soil. 

Calculate the percentages of sand, silt, and clay, which should add up to 100 percent. Healthy soil typically consists of 20 percent clay, 40 percent silt, and 40 percent sand.

This simple test can help you to decide what to grow: If your soil is high in sand, it will be well-draining. Silt and clay are hard to get wet, but they stay wet; plants that like “wet feet” would be happy here. Choose your plants accordingly and/or amend the soil:

  • If you have sandy soil, add humus or aged manure, peat moss, or sawdust with some extra nitrogen. Heavy, clay-rich soil can also be added to improve the soil.
  • If you have silty soil, add coarse sand (not beach sand) or gravel and compost, or well-rotted horse manure mixed with fresh straw.
  • If you have clay soil, add coarse sand (not beach sand) and compost


The pantry ph-test for soil acidity or alkalinity

  1. Place 2 tablespoons of soil in a bowl and add ½ cup vinegar. If the mixture fizzes, you have alkaline soil.
  2. Place 2 tablespoons of soil in a bowl and moisten it with distilled water. Add ½ cup baking soda. If the mixture fizzes, you have acidic soil.
  • If it does not react to either test, the soil has a neutral pH.
  • A very high or very low soil pH may result in plant nutrient deficiency or toxicity. 
  • A pH value of 7 is neutral; microbial activity is greatest and plant roots absorb/access nutrients best when the pH is in the 5.5 to 7 range. 

Once you figure out your soil pH, you can change or adjust it. Acidic (sour) soil is counteracted by applying finely ground limestone, and alkaline (sweet) soil is treated with ground sulfur.

Every plant prefers a different level of acidity. Use this soil pH chart to find which pH level is best for your garden plants. Then, learn how to adjust it accordingly!

The earthworm test:

The best time to check for earthworms is in the spring when the soil’s temperature has reached 50°F and its surface is moist. Use a shovel to dig up about 1 cubic foot of soil. Put the soil on a piece of cardboard, break it apart, and look for earthworms. 

If your soil is healthy, you will find at least 10 earthworms per cubic foot!

If your soil has fewer than 10 worms, add more organic matter—compost, aged manure, leaf mold. Organic matter improves structure, slowly releases nutrients, and increases beneficial microbial activity.


Always know when your soil's moist is ideal for planting, with the Stainless Steel Soil pH Meter by Smart Choice.  We've tested our stainless steel garden soil ph Meter against a digital soil pH meter, ours is more accurate, easier to read, and more durable!

- 5'' stainless steel stem

- 1.5” glass-covered display

- Sturdy, easy to read, more precise than digital pH meter

Perfect for reading soil moisture and light amount meter, outdoor or indoor garden use, and much more. Used by professional gardeners and groundskeepers to manage ideal planting and composting.


Use Natural Fertilizers:
Instead of using synthetic chemical fertilizers to feed your plants, consider relying on natural fertilizers to nourish both your plants and your soil.  
Compost, manures, bone meal, blood meal, fish meal, rock phosphate, alfalfa meal, and kelp are great natural fertilizers.

Fertilizers based on natural ingredients not only provide mineral nutrition for growing plants, they also feed the soil’s living organisms.  These organisms (most of which are microscopic fungi and bacteria) process these natural fertilizers, breaking them down into the nutrients that plants use to grow. 

.

<><><><><>

.

Wednesday, September 15, 2021


Bugbane - Flower-Shrub - a Unique Beauty in Your Garden


Bugbane - Botanical Name, Actaea: Its common name of Bugbane comes from both, its attribute of being virtually pest-free, as well as useful as a bug-repellent.  It is also known as 'Black Cohosh' or 'Purple-leaved Bugbane' or 'Black Negligee Bugbane'.  

It is an herbaceous perennial with tall flower stalks held atop a low mound of foliage.  It brings an extremely fine and delicate texture to the garden composition and should be used to full effect.

Black Negligee Bugbane features bold spikes of fragrant white flowers with shell pink overtones rising above the foliage from late summer into fall.  This is a relatively low-maintenance plant and should be cut back in late fall in preparation for winter. 

Black Bugbane is a unique beauty that boasts dark, coppery-purple foliage and spikes of fluffy, bottlebrush-shaped white flowers in mid-late summer.  Thrives in the shade, part-shade, and woodland settings with moist soils and is ignored by deer.  Its showy flowers and interesting color are great paired with more traditional shade plants like hostas and ferns.  

Black Negligee Bugbane is a fine choice for every shade garden, but it is also a good selection for planting in large outdoor pots and containers. It can be propagated by division.

Mature, it will be 2-4 feet tall and 2-3 feet wide
Hardy Zone 3 - 9

.

<><><><><>

.


Monday, September 13, 2021


Hardy Cyclamen - Becoming My Favored Fall Shade Plants


You might know Cyclamen as indoor plants and might have them in your house already. But did you know that there are flowering plants from the same family for your (shade) garden available? Very attractive ones that are blooming when many other flowers in your garden fade and very little is in bloom. Hardy cyclamen can help fill this gap by providing color from flowers while adding interest from leaf shapes and patterns.

'Cyclamen Coum' are smaller, garden-adapted relatives of the florist's cyclamen (C.persicum).  They are both native to Mediterranean regions and are the easiest species of cyclamen to grow in the home garden.  They are hardy to Zone 4 - 9 and grow best in well-drained soil rich in humus, and located in areas of dappled (not heavy) shade among trees and shrubs.  They are moderately drought-tolerant, very long-lived, and thrive with very little care.

Just make sure the plant has excellent drainage. When you water the plant, water from below the leaves so that the water doesn’t touch the stems or leaves. Water on the stems and leaves can cause them to rot. Soak the soil thoroughly and let any excess water drain away.


To grow cyclamen, plant tubers in early fall, about two centimeters deep, and at least ten to twelve centimeters apart.  Low mounds are their ideal habitat. The tubers do not multiply, but plants will self-sow, forming colonies.  In summer the plants go dormant and need a little moisture.  Watering in late summer and early fall breaks dormancy and encourages new growth.

Deep to light pink fragrant blossoms on stems 10 to twelve centimeters in height appear from late August through November, just before leaves develop.  In cultivation, white blossoms develop on some plants. Their foliage lasts until late spring and in a colony creates an almost evergreen ground cover. 

Cyclamen perform colorfully after other plants have stopped flowering, which gives you an extra-long season of shade-loving blooms - in a variety of hues. Blooms resemble charming butterflies and sit atop petite stems surrounded by lovely marbled foliage.

Hardiness Zone 3 to 9

Partial to Full Shade

Bloom Time: Late Summer to Late Fall

Size: 20+ cm wide, Height 10-12 cm

.

<><><><><>


.

Friday, July 16, 2021


How and When to Prune Roses


Why You Should Prune Your Roses

There are two main reasons to prune roses. The first is to keep them from becoming huge, ungainly monsters.  If you don't prune, it'll grow easily double the size that it usually will.  The second reason to prune is to shape the rose, remove dead and weak growth, promote new growth, and harvest blooms for vases.

.

How to Prune Roses

Wear leather gloves, long sleeves, and use sharp hand pruners. 

For shrub roses and bushy floribundas cut back to the desired size a couple of times a year.  For heirloom and species roses, prune after flowering in spring. Remove a few woody, older canes and open up the centers of dense, bushy plants to let light and air penetrate.


Big-flowered Hybrid Teas and Grandifloras: 

Remove weak, dead, and diseased growth, as well as suckers growing from the base that have different looking leaves than those of the original plant. Shorten the main canes by one-third and up to one-half in spring.


Climbing Roses:

Remove old, woody canes at ground level to promote the growth of new, vigorous ones.  Don't cut back healthy ones.  Train these onto an arbor, trellis, or fence.  If the climber is a repeat bloomer, shorten the lateral branches growing from the main canes to three buds after the first bloom in spring.


When to Prune?

 Major pruning should be done in early spring, after the last frost in colder climates.  You can also let the roses tell you — when they start to bud or leaf out, it’s time.  Zones 3 and 4 in May.  In zones 5, 6, and 7 - in March or April


Dead rose flowers can be cut back at any time in summer.  After the first killing frost, trim longer stems to keep them from snapping in winter storms.  Keep rose bushes from being top-heavy to protect them from being uprooted in strong winds. 


Pruning is vital to the health of the rose bush, it helps prevent disease by removing areas that may harbor infestations and also encourages flowering.  And don’t forget to feed your roses: Roses are “big eaters” and need proper nutrition, so feed them with a long-lasting fertilizer - or even better: ad lots of compost.


.

<><><><><>


.

Sunday, June 27, 2021


Basic Garden Design - Not Only for Beginners


Many garden owners are tempted by the displays or by special sales in garden centers and carry home whatever they find attractive. Often only a single plant of each type. Don't buy plants indiscriminately. One of everything will end up in a visual mess. Save your money until you know what you need.

First Things First
Building a house starts with the foundation!  The same is true for building a garden.  Prep your soil with lots of compost and rotted manure. Unless you are lucky to have fantastic soil, amend it first before planting anything. 
Good black soil is the safest thing to use. Lay a couple of inches of compost at soil level and dress with mulch after you've finished planting.  It will suppress weeds, keep the moisture, and even out temperatures in summer and winter.  From now on the soil should not be disturbed. The first year your garden must be watered deeply twice or three times a week.

Evaluate Light and Sun
Which way does your garden face? Calculate where you have sunny spots for 4 to 6 hours a day and apply this information to plant research.  Read the plant labels carefully and research each plant on the Internet.  Don't bother with vegetables unless you've got sun for more than 6 hours a day, and you are willing to water and weed on a daily basis.  Examine all the contours of the garden and enhance any humps by building a berm — piling up soil and covering it with compost.

Create sections or "garden rooms" 
Have an overall vision of what the garden should look like from specific parts of the house.  Now it's time to choose your trees, shrubs, and plants, and lay them out for maximum visual impact. Avoid planning them too narrow.  Find out the maximum size plants and trees will reach. 

Every garden needs a focal point
It can be a structure, a gazebo, a patio, a beautiful birdbath, or a spectacular plant.  Evaluate the volume of the plant at maturity: how wide and high will it get? Don't forget at least one to two feet of space around it.  Read the plant tags and take them seriously. 

Big structural trees come in every shape, size, and color — they are the most thrilling creatures to plant — never be casual about them.  Trees are crucial for screening, privacy, beauty, as well as creating a vertical element. 

Create layers 
Once you know what trees will grow well, look for large shrubs or small trees as the next level down (2 to 3 meters in height). We often forget this important aspect of design: eye level. You should have the feeling of walking through plants.

Create a mix of both evergreen and deciduous trees and shrubs throughout.  We need the evergreens for winter interest, as well as for bird and animal habitats.  If you want to attract butterflies, for instance, get Buddleia (Butterfly bush), Eupatorium (Bonesets), Ninebark shrubs, Weigela, or a small Hydrangea tree. 

Perennials and annuals add color to the garden  
Get plants with similar hues in the bloom to achieve a drift of color.  Plant hundreds of small naturalizing spring bulbs. They will provide the soil with cover and feed early spring insects.  Their amazing colors are a bonus.  This way you will have something blooming in every season.

Last, but not least: No Plastic in Your Garden!

Plastic is creeping in heavily for years into our personal landscape: Sitting on a PLASTIC deck with a PLASTIC canopy or awning, using a PLASTIC watering can, PLASTIC garden hoses, PLASTIC garden fence, PLASTIC trim edges for the lawn, PLASTIC garden tools, PLASTIC flower pots, and planters…

Mother Earth is precious for all living organisms - and that we need to protect the environment and do something against the thread of a climate catastrophe that is upon us and our children.  Instead of calling for the governments to do something, we should start to add our part.  Fossil fuels, plastic, pesticides, insecticides, herbicides — all that should be banned from our daily life, our families — and our gardens!

.

<><><><><>


Monday, May 10, 2021


Waterwise Flowers, Shrubs, Grasses, and Trees


.

Years ago when there was a seven-year drought in California, many municipalities offered incentives for starting water-wise gardens. Do you love to travel? Don't have an irrigation system? Is your garden huge or has many trees? In many areas, record-breaking droughts have resulted in mandatory water rationing and incentives for water-wise landscaping that uses minimal irrigation. Cutting down on or eliminating thirsty turf grass, and introducing drought-tolerant plants is a good start.


Depending on your planting zone and with a little research, there are really a lot of blooming plants out there that are low maintenance.  Once they are established, they don’t need much water. 
.


FLOWERS:

Yarrow

Salvia

Lupines

Coreopsis

Sedum (All types) 

Portulaca (All types) 

Lavender

Sage Herb

Coneflower (Echinacea)

California Poppy

Globe Thistle

Russian Sage

Orange Day Lily

Lamb's Ears


SHRUBS:

Oleander

Butterfly Bush

Blue Star Juniper

Barberry


GRASSES:

Zebra grass

Mexican feather grass

Purple fountain grass

Blue oat grass

Porcupine grass

Blue fescue


TREES:

Ginkgo Biloba

Shagbark Hickory
American Elm

Hawthorn


Consider these factors when choosing a plant for drought-tolerance, whether it's a tree, a shrub, a ground cover, or a perennial:


Competition for Resources

When you plant under trees, the available resources are scarce because a tree not only blocks sunlight and rainfall, it also takes a lot of water for itself. Weeds and other vegetation can also rob water from a new plant.


Sun Exposure

Always pay attention to sunshine requirements and/or tolerance when planting. You may think of full-sun plants when you hear mention of drought-resistant plants, but there are also suitable plants for dry shade. Moreover, not all sun-lovers tolerate excessive dryness.

The Soil Type
A drought-resistant plant in a wonderfully loamy soil may struggle during a dry spell if it's growing in sandy soil (through which water pours quickly, as through a sieve).


Save as much water as you can.  Look for plants that don’t require much water.  Why not use rain barrels and misters in the garden and landscaping to help conserve water and save on your water bill.

.

<><><><><>

.


Saturday, May 1, 2021


Your First Veggies


New to vegetable gardening? Or did you try your hands already on some greens, maybe in containers or among flowers? In any case, it is a lot of fun watching them sprout and grow. Here are some tips that might be useful:


Late March/early April is the time where impatient gardeners are sowing heat-loving veggies, like tomatoes, cucumbers, melons, and squash, indoors. The little seedlings that grow will be nurtured until the soil warms up and all threat of frost has passed, generally around the May long weekend.


However, once the soil outside has thawed enough to dig — which might be now, depending on where you live — there are cool-weather-loving crops that can be planted from seed right in the garden. These seeds are planted in the soil - they don't need that head start indoors.  However, if frosty nights are predicted, just place a clear plastic container of the soil. I always collect them throughout the year in order to have them handy in Spring.  Here are a few cool-weather crop suggestions for early veggies:


Peas 

They are one of the earliest crops you can grow, and there are different types and varieties to try.  If you are willing to sacrifice a few seeds, plant a few in a pot, so you can snip fresh pea shoots - they're pretty yummy in a salad or as a garnish.  Sow in early to mid-spring in fertile soil that gets full sun.  Also, give them a nice trellis to grow up and out.


Kale

Small-space gardeners should look for container varieties that will do well in pots.  To grow this hardy green, plant seeds anytime during the spring or early summer in well-drained, lightweight soil.  While it thrives in full sun, a kale plant will tolerate a bit of shade, as well. Cooler temperatures, or even a light frost, make small kale leaves taste sweeter - in spring or in late fall.


Beets  

They boast a number of health benefits and are delicious steamed, but you can also grate them raw into a salad.  Wait until the soil temperature is above 10ºC to sow.  Each beet needs to be ten to fifteen centimeters apart, so thin accordingly, once they sprout.  Don't let those thinned beet seedlings go to waste!  Sprinkle them over hearty dishes or in salads.


Carrots 

Carrots are easy to grow as long as they are planted in loose, sandy soil during the cooler periods of the growing season — spring and fall (carrots can tolerate frost).  Depending on the variety and local growing conditions, carrots may take anywhere from two to four months to mature.  Plant them in the spring and summer for a continuous harvest through fall!  They are grown as a cool-season crop which means the seeds are sown when soil temperatures reach about 50 degrees F (ca. 20 Celsius) in early spring. 


Thinning Your Seedlings

As painful as it may be to pull out fresh little seedlings that are eagerly pointing towards the sun, in most instances, thinning will benefit your crop.  Root veggies, like beets and carrots, need space to grow.  Use tweezers or small scissors to eliminate seedlings that might inhibit the growth of where you want your main plant to grow.  Read the seed packet to see how far apart each veggie needs to be spaced.

.


Garden Planting of Vegetables


Make sure there's enough light

Before you buy any seeds or place an order for garden supplies, start by calculating how much sunlight is available wherever you're hoping to place your plants.  A good general rule of thumb is to go with leafier plants — things like kale, spinach, lettuce — in shadier spots because they don't need as much sunlight to grow and produce.  How sunny or shady your garden or balcony space is should really guide your planting decisions.  Any hot crops that you want to grow — peppers, eggplants, tomatoes, squashes, corn — need at least seven to eight hours of direct sun a day.  Beans, lettuce, radishes, and onions are other beginner-friendly crops to consider for your first edible garden. 


Protect Your Crops

Even if you think you have planted your crops at the right time, the weather could take a turn for the worse.  There are a few accessories you can use to protect precious young plants and seedlings that have barely had a chance to grow big and strong and healthy.  Cloches, for example, will protect tender young seedlings from harm.


Raised beds, which work well for condos and rooftop gardens as well (just put in a bottom), allow you to control or change the type and quality of the soil your plants will grow in more easily.  Look up plants based on acidic soil, alkaline soil, or just regular potting mix.  For example, if you're growing blueberries you may want to add coffee grounds or pine needles to the soil to make it more acidic.


If you want the best success for your plants, go with the blends of black soil, compost, and rotted manure (chicken, cow, sheep).  Although slightly pricier, the blends incorporate amendments like composted manure or peat moss to offer more nutrients. 


Your raised garden beds can be any size you want. As taller the bed is, the less you'll have to bend over to do work in it.  And each bed can be as long as you want. As a rule of thumb, keep the width to about three feet wide.  Use containers that offer sufficient depth and also drainage (that have one or more holes at the base).  For larger-scale plants such as tomatoes, squashes, eggplants, and peppers, use a planter that's at least two feet deep, both for stability and to give the roots enough space. 

.


Read Your Seed Packages 

Read the fine print on each seed package before you purchase!  Make sure your garden or container will offer sufficient space for, and between, your vegetables — you might be able to fit in fewer mature plants than you think.  Some plants can grow quite tall and will require trellises or other vertical supports. 
Seed packages show how many days it takes that plant to grow.  In an area where there are 90 days of summer, so anything that takes more than 95 days, the likelihood of being able to grow that plant before you get our first frost of the winter is probably not very high.  In that case, you would need to start seeds indoors early enough or consider buying seedlings.  


Companion Planting

Companion planting lists can be confusing, but most plants either love tomatoes or beans, but not both.  If you're doing tomatoes, you're not planting any of the bean friends (like cabbages, eggplants, beets, broccoli, or cauliflower) close by. Instead, consider planting onions, garlic, peppers, basil, and herbs nearby.  It also can be helpful to grow pollinator-friendly flowers near crops that need pollination (i.e. tomato, pepper, and eggplant), especially if you have a balcony or rooftop garden that might not normally attract bees and other pollinators.  Marigolds are a really good option that you'll find just everywhere.  They're very cheap, abundant, and easy to start from seed.


Water Judiciously 

Plants need three to four inches of water per week. If you get two inches of rain.  Keep in mind that container gardens tend to dry out a lot faster than regular ground gardens. That might mean watering at least once a day, or two times a day sometimes, whereas, in a regular garden, you might water every other day or every three days depending on rain.  Balcony and rooftop gardens should also be watered more frequently.  You get a lot more sun intensity on a rooftop or balcony, so you want to make sure that your vegetable garden has access to water every single day.


How to Get Rid of Critters

For both urban and rural gardens alike, critters such as raccoons, deer, and rabbits can be a threat. You can surround crops with other plants that the pests don't like.  For example, if you plant onions around your tomatoes it stops the critters because they hate the smell of onions.  Same with used coffee grounds and sliced garlic.  Males can also pee onto the soil : )  It will deter these critters.
.


Mix Vegetables With Flowers

Why?  Soften the look of a vegetable garden and many flowers attract beneficial insects.  Plant them in wherever there's space — such as alyssum, sunflowers, agastache, sedums, salvia, and nasturtium.

.


<><><><><>
.