Friday, August 26, 2022


Skip the Lawn: Diverse and Hands-off Gardening


Lawns are Attractive Only to Weeds… 

I have never met a garden owner who was happy with their lawn.  They all complain about the work, the watering, weeding, fertilizing, and expensive lawnmowers.  And point out ground-covering plantains, crabgrass, creeping charlie, dandelions, and other nasty weeds. Not to mention grubs or moles that are destroying the lawn.


Perfectly manicured lawns are a thing of the past!  Who needs turf around the house that requires frequent mowing, fertilizing, raking, aerating, watering, and lots of pesticides?  Doing all this work (or paying someone for it) is not worth the effort.  Not to speak about the cost of labor, material, and most of all: the environmental impact. 


Ecological Desert

CBC wrote in an article recently: "The case for leaving the perfectly manicured lawn behind. North Americans have had a longstanding love affair with crisp blades of grass and the perfectly manicured lawns we shape them into. The tidy turf tradition isn't homegrown though: the concept was hauled across the Atlantic by colonists who maintained lawns in Europe going back to the 17th or 18th century. The growth became a staple of the leisure class who reveled in lawn games like croquet and tennis and turned it into a status symbol since bringing neatness to nature's chaos required deep pockets. And so, keeping up with the trim-turfed Joneses began.


Though its shorn blades are a bare-footer's dream and the smell of it freshly cut may be inseparable from summer nostalgia for many, a pristine lawn comes with a whole whack of taxing environmental impacts - and high maintenance cost."


Lawns are a Dead Part of Your Garden

Insects that are necessary to pollinate vegetables, flowers, fruit, and other crops cannot find anything in lawns, but the odd dandelion bloom. Bees and butterflies are not finding any wood in the sea of grass blades.


Fertilizers and pesticides can create runoff and pollute lakes and reservoirs. Nitrogen and phosphorus and other chemicals contained in these products can lead to oxygen-choking, overgrowth of algae and other plants - and kill small animals.


The fertilizers and pesticides we put on lawns can create runoff that pollutes surrounding bodies of water. In surface waters like lakes and reservoirs, the nitrogen and phosphorus contained in these products can lead to oxygen-choking, light-masking overgrowth of algae and other plants. 

The monoculture, free of wildflowers, shrubs, dead wood, and trees, is also not ideal for wildlife.  It provides neither shelter nor nutrition for flittering pollinators like bees, butterflies, and birds that help plants reproduce, creating more vegetation — our food.


Lawns also require a huge amount of water to maintain, drinking water that can be better used.  This obscene amount of drinking water onto our lawns makes them green because they're the wrong species for our climate.  Turf spends a large chunk of the summer on "life support," browning and dying in peak season because the grass isn't living in its ideal climate.  


Kentucky bluegrass is a species brought over by colonists from much wetter and cloudier areas, such as the UK or Ireland.  The same with dandelions: Europeans brought over dandelions because they were medicinal and useful, they ate the greens, roasted the roots, and made tea.


Smart: Growing Native Plants due to Raising Water Costs

Water-wise landscaping, a xeriscaped yard has the potential to cut watering at least in half - and it looks much prettier.  Start by digging out a part of the lawn and planting drought-tolerant shrubs and flowers.  You even don’t need to dig out the lawn, just cover it with wet cardboard in the fall, and secure this with a couple of big rocks. 


Comes spring, place good garden soil mixed with compost or composted manure, at least 1 foot high.  Plant sedums, Russian stonecrops, salvia, Santolina, sunflowers, irises, lavender, ornamental pink Muhly grass, rudbeckia, coreopsis, milkweed (especially for butterflies), yarrow, lupine, coneflowers, and in shade parts aruncus plants or hostas of a variety of leaf colors. Then mulch this new flower bed well.


Blooming Shrubs

Small shrubs that need water only a short period after planting are wild roses rosa rugosa), burning bush, sea buckthorn, privet, beauty bush, rose glow barberry, forsythia, or butterfly bush, just to name a few.  A little bit of blooming is all maintenance they need once a year. 

Mulch the ground well and the area around the shrubs will be weed-free.


Ornamental Grasses

Jodi Delong wrote in an article in Saltscapes: "Like many gardeners, I evolved into a love affair with ornamental grasses, and now I can’t imagine a garden without them. Oh, for sure, in the spring they don’t look like anything but a bunch of dead sticks, but as we roll into summer and autumn, they take on delightful texture, and make gorgeous sounds as the wind whispers through them…


And many produce elegant and long-lasting flower heads that are eye-catching.  As an added bonus, many types of grass have interesting colors throughout the season—not just green!—and great fall/winter colors, too. What’s not to love?


Most of these ornamental grasses offer more than ornamental value.  If you want to create a relatively quick screen to block the view of an unsightly fence or just to add some privacy to your yard, some grasses get quite large and showy.  Most importantly for many gardeners, they are relatively problem/pest free.  Best of all, deer do not like the majority of grasses: their tough, sharp leaves (blades) aren’t at all appetizing to Bambi.


Another idea, in case you want to keep your lawn, is to over-seed it with short-growing clover.  The benefits?  You will never have to mow again and your lawn is always green - even through a drought.  


Lawns are an anomaly.  And they may no longer fit the realities of the world we live in.  In today’s world, we worry so much about environmental issues, it is satisfying to have something that's really under our control - our gardens.


https://www.epicgardening.com/xeriscape-plants/

https://www.pinterest.ca/rvs11/drought-tolerant-plants-zone-4/


https://www.naturehills.com/blog/post/drought-tolerant-plants-for-the-landscape


https://blogs.scientificamerican.com/anthropology-in-practice/the-american-obsession-with-lawns/


.


<><><><><>

.


Thursday, August 4, 2022


Photos from Mediterranaen Island Sardegna


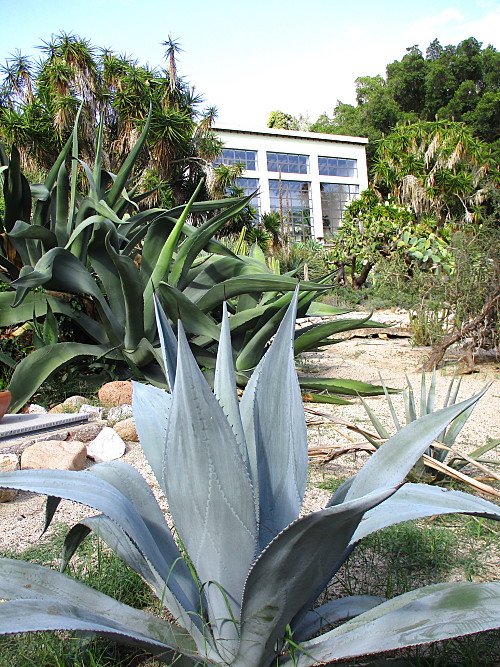
Called Sardegna (Italian) Sardigna (Sardinian) Saldigna (Gallurese) Sardenya (Catalan) or Sardinia (German), I am always amazed by the beautiful plant I discover there. And I even took a 4-hour train trip across the whole island to visit the Botanical Garden in Cagliari.


The island, in the heart of the Mediterranean Sea, is home to some exotic species that represent an integral part of the Sardinian territory, an ideal place for an adventurous vacation to explore the unspoiled nature, embraced by the winds that dominate the land called Icnussa by the ancient Greeks. 


A green open-air paradise that the Mediterranean climate contributes to make unique, where endemic species are coupled with plants from Africa, Asia, and some parts of South America.


The Sardegna island is blessed by a great range and variety of plant species, a mild climate, and beautiful wild scenery. This heritage is enriched by another element: a popular tradition dating back thousands of years in natural remedies and food preparation.


On my bucket list are visits of the seven historical gardens of Sardinia. It will tour the whole island in a week or in several short breaks.  It starts in the north-west, in Sassari's park of Monserrato, then moves to the north-east, to Caprera and the garden-island of Garibaldi.  From here the tour moves on to the center, in the Nuorese region with the English park of Villa Piercy of Bolotana.  Then I'll visit the Oristano area, in San Leonardo di Siete Fuentes (Santu Lussurgiu), the Pernis-Vacca citrus garden, the Vega of Palazzo Boyl (Milis) and the Italian garden of Aymerich Park in Laconi.  The grand finale is the 'green' route to the Patrizio Gennari botanical gardens in Cagliari - which I visited already.

.
<><><><><>
.

Tuesday, July 5, 2022


How to Care for Climbing Roses


One of the most beautiful focal points in gardens and parks are rose trellises and arbors with their abundance of flowers.  They are a perfect choice for English-style or formal gardens.  I recently had to find two climbing rose plants in a certain color and it took a while until I found them in a nursery that was far out of my way.  I was surprised that not every nursery or garden center was carrying these marvelous and long-blooming additions to every garden.

An obelisk or pillar adorned with roses adds a strong vertical dimension to a flower border.  Create a beautiful focal point in the center of a bed, or place two or more along a long border to create a visual rhythm.

For pillars: train the stems in a spiral around them to encourage the flowers from the ground upwards. Tie-in at ten-inch intervals, attaching the rose to the pillar.  And for obelisks, train a couple of the main stems straight up to the top of the structure.  Then spiral the other stems around the structure, tying in as you go - this encourages flowers from the ground upwards. 

Training roses up an arch: An arch is perfect for linking different areas of a garden and forming an entranceway with flowers overhead.  Train your climbing roses on either side of your arch, upwards and over the top of it, tying in to the arch.  Create an even coverage with your two roses meeting in the center point at the top of your arch.

Roses over a pergola: For the uprights of a pergola, train your rose in a similar manner to training it up a pillar, training the stems in an upwards spiral.
.


Climbing Rose Care

For the first year or two, climbers should be trained in the direction you want them to grow.  Prune only to remove dead or diseased branches.  This will allow the plant to establish itself and expand at the base for a fuller appearance.

Roses need at least six hours of direct sun every day.  If your climbing rose is not getting enough sunlight, it still may produce leaves, but it will not have the energy to produce flowers.  If shade is impossible to avoid, try to plant your climbing rose in a location where it receives morning sunlight. 

Climbing roses prefer slightly acidic, well-drained soils.  Dig your planting hole wide and deep enough to accommodate the plant’s roots when spread out.  Loosen the soil at the bottom of the hole to allow the roots to easily grow deeper.  Before you plant soak the pot with the roses in a bucket of water for an hour, and water well after planting.

Water deeply in the first year to establish roots.  Mornings are best.  Water the soil at the base of the plant - not overhead leaves or flowers!

The best fertilizer for the roses is compost, also a bit slow releasing.  Other than that, liquid fertilizers, have the advantage of getting the nutrients to the roses' roots quickly.  A monthly application of a high phosphorous fertilizer, such as 9-14-9, encourages blooming and provides adequate nutrients for your roses.

Deadheading (removing spent flowers) will encourage more flowering on repeat-blooming varieties.  After the first year or two, you can begin lightly pruning as needed in early spring for maintenance and shape. This will also help promote new growth.  The main canes that come directly from the base should be pruned after flowering.  The lateral canes produce the flowers and can be lightly pruned any time of the year in order to keep the climber in shape. 

You can even propagate climbing roses from hardwood cuttings or semi-ripe cuttings. Hardwood cuttings are taken in winter when the plant is dormant, and semi-ripe cuttings are taken in late summer after flowering.

With the proper initial training and regular maintenance pruning, climbing roses can be a glorious garden backdrop and will bring joy for many years.

Happy Rose Gardening!


Resources:

https://www.thespruce.com/prune-and-train-climbing-roses-3269551

https://www.gardenersworld.com/how-to/grow-plants/how-to-grow-climbing-roses/

https://www.starkbros.com/growing-guide/article/all-about-climbing-roses

https://homeguides.sfgate.com/climbing-rose-growing-well-but-not-blooming-flowers-96860.html

.

<><><><><>

.


Gardening Joy and Challenges: The Good and the Invasive Weeds


Removing weeds is the most disliked gardening chore by almost all gardeners.  However, there
are "good" weeds such as Goldenrod (Solidago species) and Joe Pye Weed (Eutrochium purpureum) which are native species that support pollinating insects and birds and contribute to the ecosystem.  Another beneficial weed is clover.  As a legume crop, it fixes nitrogen in the soil and nourishes surrounding plants.  Instead of ripping it out, hark clover underneath the soil. 

Other weeds can be aggressive and choke out expensive garden plants. Some produce biochemical(s) that influence the germination of seeds and hamper the growth, survival, and reproduction of other plant species.

Weed which you definitely want to avoid:

Bindweed has lovely flowers, but it is not welcome in the garden because of its aggressive growth and its ability to resist containment because of its extensive root system.  Some reports have said that the roots can grow as deep as 6-30 feet and have seeds that can germinate decades (more than 20 years) later.  It twines and climbs up amongst garden plants and competes for sunlight, moisture, and nutrients.  If even the smallest piece of root is left remaining in the soil, a new plant will form.


Dandelions are considered weeds and grow over-abundant. However, they are pretty and considered super-food: their leaves are a great addition to salads, their roots can be grilled, and the flowers can be prepared as a fruit wine or infuse vinegar or oils.

Invasive Weeds That Need to go:

  • Dog-Strangling Vine
  • Bindweed
  • Plantains
  • Thistle
  • Purslane
  • Garlic mustard 
  • Buckthorn tree/shrub
  • Japanese Knotweed shrub
  • Poison Ivy

Important: Don't pull the weeds, dig them out to get all roots, otherwise they will grow back.  And please always wear gloves!  Weeds between stepping stones can be erased by pouring boiling water or a mixture of vinegar, salt, and boiling water over them.  Choose a hot and dry day and repeat the procedure after a couple of days.

How to Prevent Weeds

Weeds are growing mostly on disturbed soils.  Start with adding compost and rake it into the soil. Then add at least eight inches of natural cedar mulch.  Weeds are prevented by mulch, and even if one or the other grows over the years, they are very easy to yank out.  An additional benefit of mulching is that moisture is kept in the soil and temperature differences in summer or winter are evened out. 

Read more:

https://www.oneearth.org/the-various-advantages-of-clover/

https://www.thespruce.com/controlling-and-preventing-bindweed-2540090

https://www.gardeningknowhow.com/edible/herbs/dandelion/uses-for-dandelions.htm


.


Sunday, June 12, 2022


The Two Most Important Tips for Your Flower Beds


Edging is the Most Important Task

Starting a new flower bed or sprucing up an existing one: Not only does edging your flower beds create a visual barrier between the lawn and the garden, as well as cuts down the required maintenance required to keep that crisp look.

Once the grass from your lawn has invaded your flower bed, it is very challenging for gardeners to get rid of the grass without killing the ornamental plants as collateral damage. Digging or pulling up grass and weeds is a laborious task and not very feasible. Thus, the best method is prevention—preventing grass from ever-growing in the nutrient-rich gardening soil in the first place.


To prevent grass from invading your flower bed, it is imperative then, that the edging be inserted deep enough into the ground to block these roots from growing under the grass barrier. It also must block any germination underneath the flower bed and sprouting up above ground.

Read more:

https://grassbarrier.com/blogs/grass-barrier-blog/edging-for-flower-beds-that-is-attractive-and-functional


https://www.funkyjunkinteriors.net/2012/07/how-to-edge-flower-beds-like-pro.html


Never, Ever Use Landscape “Fabric”

Landscape fabric contains petroleum and other chemicals that can compromise the growth of your flowers and shrubs.

Contrary to what sellers of plastic fabric are telling, only a very small fraction of weeds are in the ground, many weeds are in the soil of plants you are purchasing, or contains in garden soil or mulch. Most weed seeds are flying through the air, are distributed by pouring rain, or are spread by birds into garden beds. 


There is no need to use any fabric if you mulch thoroughly. Mulch will do the trick, but most people don’t put it on thick enough. The plastic fabric is contra-productive as it holds the roots of weeds or grass, so they cannot be totally removed and will re-grow. 


Healthy soil is crumbly and loose. Loose soil allows for nutrients, water, and even air to reach down in the soil and help plants to grow. Underneath the landscape fabric, the soil becomes hard and compact. 


Last but not least: We all should try to avoid any plastic at all in order to save our environment and the planet!


If you really want to create a barrier - thick layers of newspaper sheets or brown cardboard (remove all stickers and tape!) are a much better solution - apply before you add a thick layer of mulch.


Read more:

https://learn.eartheasy.com/articles/12-easy-ways-to-reduce-plastic-in-the-garden/

https://www.yourgreenpal.com/blog/6-reasons-why-landscape-fabric-is-a-bad-idea


https://www.dallasnews.com/arts-entertainment/2019/04/30/why-plastic-landscape-fabric-is-actually-bad-for-your-plants-and-the-soil/


.

<><><><><>

.


Wednesday, June 1, 2022


Five Reasons NOT to Use Landscape Fabric


Seed- and gardening specialist Barbara Schaefer wrote in her latest blog:
"When you buy an old property, you are full of ideas and visions of what it might have been, and what it could become under your care.  My gardener’s brain was flooded with the possibilities.  Gorgeous shrubs, lush peonies, irises, lilies, tulips, maybe a little tree.  A vision of loveliness…  I thought, with persistence and determination I can turn this garden into an oasis. 

Lying in wait for me under thick layers of grass and weeds was landscape fabric in varying degrees of disintegration.  If you have ever encountered this, then you know what’s coming:  Slow and back-breaking work.  The landscape fabric was steadfastly intertwined with both the weeds and the plant roots that I wanted to salvage."


Landscape Fabric — Use at Your Peril

"Originally developed for agricultural use in crop production as an alternative to herbicides, it is considered a ‘synthetic mulch’, a non-chemical weed control.  With its great success in agriculture (think long rows of healthy vegetables poking through the black fabric), it attracted the attention of landscape designers.   

Some thought it could be used as a non-biodegradable, permanent solution to weed control in vast landscape projects, allowing water and air to flow through, but not the sunlight, thereby preventing weed germination. Or so they thought…"

Five Reasons NOT to Use Landscape Fabric: 

Read more: https://gardensbybarby.ca/evolution-of-a-garden/

.

<><><><><>

.


Thursday, April 14, 2022


How to Care for Spring Bulbs After Blooming

Spring bulbs I always plant behind flowers that grow higher in the spring, so one doesn't see the yellowed leaves.  After flowering bulbous flowers such as hyacinths, daffodils, and tulips in the garden do not look very attractive.  Therefore, to simply cut them off would be a pity, because then they will not bloom next year.


Do Not Cut Off Leaves
Rule number one for early bloomers is: Cut off only the flowers and the stem, but not the leaves.  Instead, let them dry out slowly.  Only in this way can the bulb gather strength for flowering the following year. This is because the foliage leaves provide vital energy for the bulb until they wither.  The plant needs to prepare for the next growing season and to survive during the dormant period. 

Dig Up Flower Bulbs and Store them in a Dry Place.
Important: Flower bulbs must be stored in a dry and air-permeable place, such as a paper bag, or they will rot.  Once the leaves have dried up, there are two options.  The easiest is to dig up the bulbs.  Then they must be freed from the foliage, cleaned, and dried.  This works well, for example, in a net, which is hung in a dry place.  Important: Keep only healthy bulbs.  Sort out all others and dispose of them in the trash, not in the compost, because from there plant diseases can spread throughout the garden.

After drying, bulbs should be stored in a cool, dark, and dry place, such as a paper bag or basket.  A cardboard box in which the onions are sorted layer by layer, each separated by a layer of newspaper, is also good.  Tip: Label the bag or box so that you know later which bulbs it is. In the fall, the bulbs can be put back in the ground.

Fertilizing Spring Bulbs
If you have planted bulbs of snowdrops, daffodils, or tulips in the garden, every year you can watch how the flowers quickly sprout and form flowers.  However, the blooming will decrease over the years.  This is because the plants extract nutrients from the soil.  To keep the plants as long as possible, the bulbous plants need fertilizer.

Use Universal Fertilizer or Horn Meal
As soon as the stems protrude about ten centimeters from the ground, the plants should be supported with a universal or complex fertilizer.  Fertilizers in liquid or solid form are suitable for this purpose, provided the dosage instructions are followed.  It is also helpful to carefully work horn meal or fine horn shavings into the soil between the tender shoots, which are usually in groups.  This organic fertilizer is decomposed by microorganisms and tiny creatures.  The process takes weeks and so gradually the fertilizer reaches the bulb flowers and strengthens them.  Beautiful flowers next spring will show up.

.

<><><><><>

.


Tuesday, April 5, 2022


One of the Best Things for Your Garden: Used Coffee Grounds


Used coffee grounds – leftover from using a coffee maker – contain a substantial amount of nitrogen, as well as potassium and phosphorus.  Coffee grounds are an ideal fertilizer in the garden and also improve depleted potting soil and compost. The all-rounder can also help against slugs.

At one point I drove every week to Starbucks with two pales to let them fill with coffee grounds,  My car smelled wonderfully for days and so did my garden.  I sprinkled thick layers over the soil and racked it in a bit.  Weeks later I enjoyed fantastic soil, no weeds, and beautiful flowers.

Coffee grounds can be used in the garden primarily as a fertilizer because it contains lots of valuable ingredients such as potassium, nitrogen, phosphorus, tannic acid, and antioxidants.  These are nutrients that can also be found in commercial fertilizer products.

Allow drying before use.  The basic requirement for use is that it is always well cooled and dry, as moist coffee grounds mold easily.  To do this, place the coffee grounds in an open, wide container and allow them to air dry.


Fertilize with coffee grounds

Coffee grounds have a low pH value and are therefore particularly suitable for fertilizing plants that require acidic garden soil.  Ornamental plants include, for example, hydrangeas, rhododendrons, and camellias.  Coffee grounds fertilizer is also suitable for crops such as cucumber, tomato, zucchini or blueberries, and strawberries.

The nitrogen contained in coffee grounds ensures strong leaf growth, and phosphorus stimulates flower formation and fruit ripening. Potassium is important for cell structure and plant stability. Only young seedlings do not tolerate caffeine well. To fertilize, simply work the coffee grounds into the soil, such as with a rake.

Use in irrigation water.

Coffee grounds neutralize calcareous irrigation water.  If the soil is very alkaline and the water contains lime, a spoonful or two of coffee grounds in the water can work wonders.  It neutralizes the pH and fertilizes the soil at the same time.  Coffee grounds, on the other hand, are not good for watering houseplants, as they can cause mold to form over time. 

However, mixed with water in a 1:1 ratio, cold coffee can be used once a week to water house and balcony plants.  Especially Cyclamen, Philodendron, Christmas Cacti, Azalea, and Orchids.

The benefit of using coffee grounds as a fertilizer is that it adds organic material to the soil, which improves drainage, water retention, and aeration in the soil. The used coffee grounds will also help microorganisms beneficial to plant growth thrive as well as attract earthworms.

Coffee grounds improve compost and potting soil.

Coffee grounds also find a good use on compost.  It accelerates decomposition, enriches the soil with nutrients, and provides food for earthworms.  To prevent mold from forming, sprinkle the coffee grounds on the surface, and put the filter in separately.

Depleted potting soil can also be improved with coffee grounds and then reused.  To do this, mix the old soil with compost in equal parts and fold in the coffee grounds in small amounts.  However, if there is too much coffee in the soil, mold can easily form.


Coffee grounds can protect against slugs

Snails do not like caffeine.  Coffee grounds are therefore suitable as a barrier layer that can simply be scattered around the vegetable patch.  However, this does not apply to all species.  Depending on which species of snail threatens the lettuce, it is definitely worth a try.

Many people feel that coffee grounds lower the pH (or raise the acid level) of soil, which is good for acid-loving plants.  This is only true for unwashed coffee grounds though.  Fresh coffee grounds are acidic. Used coffee grounds are neutral.  If you rinse your used coffee grounds, they will have a near-neutral pH of 6.5 and will not affect the acid levels of the soil.  To use coffee grounds as fertilizer, work the coffee grounds into the soil around your plants.  Leftover diluted coffee works well like this too.


Protection against pests and critters

Both coffee grounds and brew can be used against aphids.  Fortunately, coffee grounds and brews are suitable for almost all plants and plant species.  You can use it not only to combat aphids, but also other species or pests.  Potted plants and plants in flower beds are suitable. In addition to plants in the garden or on the terrace or balcony, indoor plants can also be treated with it.

It is a natural household remedy that does not release any harmful substances into the home!

Treatment is possible all year round for indoor plants and outdoors in dry weather.  You should always let the coffee grounds dry before using them on the soil.  If you add it to the plant soil when it is wet, this can cause the soil to become moldy.  You can spray the coffee grounds on the leaves, the shoots, and the leaf axils of the plant.  The plant may then be dripping wet, but not much of the brew should get onto the soil.

If you do not have coffee in the house, you can also use black tea.  This also contains caffeine.  You can make a brew from two bags of black tea and one liter of water.  You can also spread the contents of the tea bags on the soil of the plant.

Coffee grounds accumulate regularly but usually end up in the trash.  

What a pity!  Don't be one of these ignorant gardeners!


Read more:

https://www.gardeningknowhow.com/composting/ingredients/coffee-grounds-gardening.htm

https://www.homesandgardens.com/advice/are-coffee-grounds-good-for-plants

https://balconygardenweb.com/houseplants-that-love-coffee-grounds-for-plant-growth/

.

<><><><><>

.

Saturday, March 26, 2022


Steps to Easy, Automated Garden Watering


The best time to water the garden in the summer is in the morning between four and six o'clock. At this time the soil is well cooled down after the night and the water hardly evaporates. But who wants to get up so early every day?


The remedy is an automatic garden watering system that allows sprinklers and sprayers to turn themselves on and off.  Thanks to smart technology, it can even detect whether rain is expected in the next few hours.  If so, the water tap will of course remain turned off.


From what garden size is an irrigation system worthwhile?

An irrigation system can make sense from 600 square ft of garden area. The larger the garden and the lawn area are and the more beds, hedges, and useful plants are on it, the more recommendable an automatic solution is.


Otherwise, you would have to stand in the garden for hours to water it sufficiently.  Well, maybe no one but me : )  I find watering the soil one of the most relaxing gardening pleasures. However, I am laying the hose down, pointing it in the direction where most water is needed. This way I don't need to 'stand'.  The following principle applies: It is better to water less frequently, but more abundantly.  Then the water also reaches deep-lying roots.


How do you install an irrigation system? 

First of all, garden owners need to be clear about which plants they want to water and in which places.  Not every plant needs the same amount of moisture.  Plants in shade might require less than some of those planted in sunny areas.  But as always: read the labels or search the Internet or gardening books!  The key is to have a watering schedule.  You can often create that online on the irrigation manufacturers' websites.  But garden professionals can also help.


Important questions: 
How long are the paths from the watering hole to the plants?  Where can vigorous watering be used, where is drip irrigation more sensible?  Can a central control system manage this or do you need a decentralized solution?


What information is important before making a purchase?

I need to know how strong the pump and garden water pipes are and how many liters per hour pass through.  Based on this value, it is possible to calculate how many sprinklers and valves you can connect to the line. This applies to all systems.  It doesn't matter whether the irrigation is controlled by a timer or an app.


Is it worth it to run the hoses underground? 
It's not worth it to run hoses underground in every case.  It's better to lay drip hoses or drip pipes above ground and then cover them with a big layer of mulch.  This protects them from sunlight and reduces evaporation.  However, if it does get below freezing in the winter, you will need to bury it below the frost line. To find out the depth of the frost line, you should consult your local government agency that handles building permits.


If garden owners want to avoid tripping:
Distribution lines are usually laid 20 to 40 centimeters (12-24 inches) below ground level.  Then they are not in the way.


What do you need in addition to garden hoses?

That depends on how sophisticated you want the irrigation system to be.  For the simplest option, a timer mounted between the water connection and the garden hose is all that's needed. 


The timer controls the flow through a valve.  This allows you to set when and how long to water, for example, every twelve hours for 30 minutes. Or much better: one hour every three days.


A sensor can help to target the plants more precisely.  You install it at a reference point in the garden.  It measures the soil moisture and sends corresponding signals to the control center.  After extensive rain, the water doesn't come back on until the set value is reached.  


You still might enjoy the pleasure of hand-watering the soil of your flower baskets, window flower boxes, and planters.  But not please not overhead the blooms and leaves!  And don't forget to fertilize them from time to time in spring and early summer.


Read more:

https://heartlandhoses.com/can-you-bury-a-garden-hose


https://housecaravan.com/should-you-bury-drip-irrigation-lines/


.

<><><><><>

.

Saturday, March 19, 2022


Easy Composting the Right Way


Approximately 92% of household food waste still goes directly to landfills, where it anaerobically decomposes, expelling methane – a greenhouse gas 25 times more potent than carbon dioxide - into
the atmosphere.  Don't be that jerk - rather compost kitchen scraps the right way in your own garden!  It saves not only the environment but also money in your purse...

You can easily improve your flower garden with compost, top dress your lawn, feed your growing veggies, and even mulch your planting beds with compost.  Once you get your compost pile started, you will find that it's an easy way to repurpose kitchen scraps and other organic materials into something that can help your plants thrive. 

Common misconceptions of home composting are that it's too complicated, it will smell funny, and it's messy.  This may be true if you compost the wrong way, but composting the right way is actually quite simple.  Just layer organic materials, add a dash of soil and a splash of water, and wait for this mixture to turn into humus

What Goes Into the Compost:

  • Fruit and vegetable scraps
  • Coffee and tea grounds
  • Crushed Eggshells 
  • Grass and plant clippings
  • Dry leaves and small dry branches
  • Finely chopped wood and bark chips
  • Shredded newspaper and office paper
  • Straw and paper egg cartons
  • Small amounts of ash from your fireplace
  • Sawdust from untreated wood
  • Lint from your dryer
  • Hair and nail clips, dog or cat hair
  • Spent soil from indoor/outdoor flower pots
  • Yard trimmings and grass clippings 

Keeping a container in your kitchen, or even better a large paper grocery bag, and piling your kitchen waste onto some sheets of newspaper, wrap it and place it in this device until filled up.  If you collect it this way it doesn't small.  I practice this for years!  In summer I place the whole paper bag into a hole that I dug in my flower beds,  and then fill and top it with soil.  In winter I collect it in my garage until it is warm enough to dig again.


Start building your compost pile by mixing three parts brown with one part green materials.  If your compost pile looks too wet and smells, (which doesn't happen if you pack kitchen scraps into the paper) then add more brown items. Aerate the pile every ten-day. If you see it looks extremely brown and dry, add green items and water to make it slightly moist.

Add about 4 to 6 inches of compost to your flower beds and into your pots at the beginning of each planting season.  Or even better: compost directly into the soil instead of a (god forbid plastic) composting bin in your garden.

It works like this: decide a spot where you want to plant in a couple of weeks.  Dig a hole at least one foot deep and wide.  Throw a couple of dry branches (ca. 8 inches long) into the hole, then add your collected compost items to fill it half, add a thin layer of garden soil or composted manure (chicken, cow, or sheep), then fill the hole with more compost, and on top again a layer of soil.  Add some water to moisten it and use a thin metal stick to aerate the 'compost bin'.   Should you have lots o squirrels or raccoons in your area, place a flat stone or a flower planter on top for the first two weeks to deter them from digging.  Within three or four weeks you can plant in this compost-improved soil.

Sources:

https://www.bhg.com/gardening/how-to-garden/no-dig-gardening/

https://www.goodhousekeeping.com/home/gardening/advice/a23945/start-composting/

https://www.gardenary.com/blog/the-basics-of-composting-in-your-own-backyard

https://www.bhg.com/gardening/yard/compost/how-to-compost/

https://facty.com/network/how-to/how-to-compost-at-home

https://www.bhg.com/gardening/yard/compost/9-common-composting-mistakes-you-may-be-making/

https://gardensbybarby.ca/

.

<><><><><>

.


Wednesday, March 2, 2022


Creating Habitat for Pollinators


Seed and plant specialist Barbara Schaefer explains in her blog how to make a habitat for pollinators - using the example of the sweat bee:

"In early spring, insects are still in diapause (a state akin to hibernation). They are triggered to wake up when the weather warms and/or the day-length increases. Cutting down dead plant stems too early in the spring will disturb them before they have a chance to emerge."

Prevailing knowledge said it was a sign of good gardening to have a tidy garden, providing fewer places for unwanted pests to overwinter.  Turns out that I was dead wrong."  

"So, back to the fall … if I knew then what I know now, I would have done more than just leave the leaf litter and the stalks. I would have added a variety of over-wintering habitats for insects, such as decomposing logs and random rock piles".


"My gardens are not only for my enjoyment and satisfaction but also home to insects that pollinate my plants and whose larvae feed nestlings of songbirds. As a steward of the land, I have a large role to play in my small part of the world". 

I have learned that some butterflies overwinter as adults. They nestle into rock fissures, under tree bark, or in leaf litter until the days grow longer again and spring arrives. Other butterflies overwinter in a chrysalis, either found hanging from dead plant stems or tucked into the soil or leaf litter. And still, other butterfly species spend the winter as a caterpillar rolled into a fallen leaf or inside the seed pod of a host plant.

Predatory insects may also spend the winter ‘sleeping’ in my garden as either adults, eggs, or pupae. They are one of the best reasons not to clean up the garden in the fall because they help control pests. If I want to have a balanced population of predatory insects, I must provide diverse winter habitat.

Some insect-eating birds have not flown south for the winter. They are quite good at gleaning ‘hibernating’ insects off dead plant stems and branches, and out of leaf litter (when it’s not buried in heavy snow). Not cleaning up the garden means there will be more protein-rich insects available to them during the coldest part of the year. The more insect-nurturing habitat I have, the greater the bird population will be. Further, seed-eating birds will appreciate the seeds and berries they can find on intact perennial, annual, and shrub stems.

Read her eye-opening blog post here: 
https://gardensbybarby.ca/gardening-for-pollinators/

.
<><><><><>
.